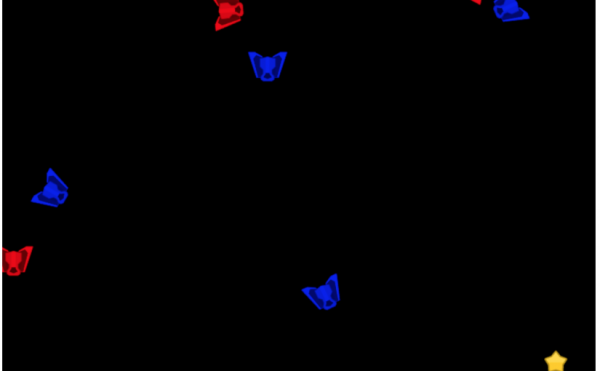
In Part 1 of this tutorial, we created our Node.js server, set up a basic Phaser game, and set up our server to run Phaser in headless mode, and in Part 2 we started adding in the logic for adding and removing players to our game.
In this tutorial, we are going to add the client side logic for displaying other players in our game, add the logic for handling player input, and add logic for the collectibles players will pick up.
Let’s get started!
Table of contents
Course Files and Versions
If you didn’t complete Part 2 and would like to continue from there (having completed Part 1), you can find the code for it here.
You can download all of the files associated with the source code for Part 3 here.
At the time this tutorial was written, the following versions were used. You may need to use these versions to have the same results from this tutorial.
- Node.js: 10.13.0
- JSDOM: 13.0.0
- Express: 4.16.4
- Socket.IO: 2.1.1
- Datauri: 1.1.0
Did you come across any errors in this tutorial? Please let us know by completing this form and we’ll look into it! FINAL DAYS: Unlock coding courses in Unity, Godot, Unreal, Python and more.
Showing other players
In our last tutorial, we wrapped up by adding the logic for displaying the player in our game and now we will work on displaying other players in our game. In part two of this tutorial, we set up Socket.IO to emit a newPlayer and a disconnect event. We will use these two events, and our current logic for the currentPlayers event to add and remove other players from our game. To do this, open up server/public/js/game.js and update the create function to match the following:
function create() {
  var self = this;
  this.socket = io();
  this.players = this.physics.add.group();

  this.socket.on('currentPlayers', function (players) {
    Object.keys(players).forEach(function (id) {
      if (players[id].playerId === self.socket.id) {
        displayPlayers(self, players[id], 'ship');
      } else {
        displayPlayers(self, players[id], 'otherPlayer');
      }
    });
  });

  this.socket.on('newPlayer', function (playerInfo) {
    displayPlayers(self, playerInfo, 'otherPlayer');
  });

  this.socket.on('disconnect', function (playerId) {
    self.players.getChildren().forEach(function (player) {
      if (playerId === player.playerId) {
        player.destroy();
      }
    });
  });
}
Let’s review the code we just added:
- We updated the function that is called when the currentPlayers event is emitted to now call the displayPlayers function when looping through the players object if that player is not the current player.
- We used socket.on() to listen for the newPlayer and disconnect events.
- When the newPlayer event is fired, we call the displayPlayers function to add that new player to our game.
- When the disconnect event is fired, we take that player’s id and we remove that player’s ship from the game. We do this by calling the getChildren() method on our players group. The getChildren() method will return an array of all the game objects that are in that group, and from there we use the forEach() method to loop through that array.
- Lastly, we use the destroy() method to remove that game object from the game.
Before we can test our new logic for adding other players to our game, we need to load an asset for these players. You can find that asset here.
This image will need to be placed in the public/assets folder. Once the image is there, we can load this image into our game. In the preload function, add the following line:
this.load.image('otherPlayer', 'assets/enemyBlack5.png');
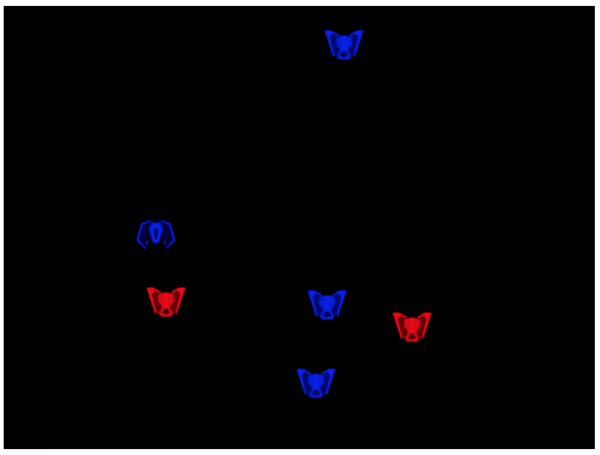
Now, if you refresh your game in the browser, you should still see your player’s ship. If you open another tab or browser and navigate to your game, you should see multiple sprites appear in the game window, and if you close one of those games you should see that sprite disappear from the other games.
Handling player input
With the logic for displaying all of the players in the game in place, we will move on to handling player input and allow our player to move. We will handle player input by using Phaser’s built-in keyboard manager and instead of moving the player directly on the client side, we will use Socket.IO to send the player’s input to the server. To do this, add the following code at the bottom of the create function in public/js/game.js:
this.cursors = this.input.keyboard.createCursorKeys();
this.leftKeyPressed = false;
this.rightKeyPressed = false;
this.upKeyPressed = false;
This will populate the cursors object with our four main Key objects (up, down, left, and right), which will bind to those arrows on the keyboard. Then, we just need to see if these keys are being held down in the update function. We also created three new variables for keeping track of which keys are currently being pressed, which will be used in the update function.
Since we will be using Socket.IO to send the player’s input to the server, we could just send a message to the server any time one of these keys are being held down. However, this would result in a large number of calls to the server that are not needed. The reason for this is because we only need to be aware of when a player first presses a key down and when they let go of the key. To keep track of this, we will use the three variables we created above to store the state of which keys are being pressed, and when the state changes we will then send a message to the server.
Now, add the following code to the update function in public/js/game.js:
const left = this.leftKeyPressed;
const right = this.rightKeyPressed;
const up = this.upKeyPressed;

if (this.cursors.left.isDown) {
  this.leftKeyPressed = true;
} else if (this.cursors.right.isDown) {
  this.rightKeyPressed = true;
} else {
  this.leftKeyPressed = false;
  this.rightKeyPressed = false;
}

if (this.cursors.up.isDown) {
  this.upKeyPressed = true;
} else {
  this.upKeyPressed = false;
}

if (left !== this.leftKeyPressed || right !== this.rightKeyPressed || up !== this.upKeyPressed) {
  this.socket.emit('playerInput', { left: this.leftKeyPressed , right: this.rightKeyPressed, up: this.upKeyPressed });
}
Let’s review the code we just added:
- First, we created three new variables:
left,right, andup. These variables will be used to store the previous state of the pressed keys. - We then check to see if the up, left, or right keys are being pressed down. If they are, then we update the
keyPressedvariables with the new state and if they are not pressed then we set those variables to false. - Lastly, we check to see if the state of one of the keys has changed, for example, if the player was not pressing the up key and now they are. If the state has changed, then we emit a
playerInputmessage that passes the state of each key.
Next, we will need to update the logic on our server to handle the new playerInput message. To do this, open authoritative_server/js/game.js and add the following code below the socket.on('disconnect', function () { code:
// when a player moves, update the player data
socket.on('playerInput', function (inputData) {
  handlePlayerInput(self, socket.id, inputData);
});
Next, add the following code below the update function:
function handlePlayerInput(self, playerId, input) {
  self.players.getChildren().forEach((player) => {
    if (playerId === player.playerId) {
      players[player.playerId].input = input;
    }
  });
}
In the code above, we did the following:
- First, we listened for the
playerInputmessage and when this message is received we called a new function calledhandlePlayerInput, and we pass it a reference to the current scene, the socket id of the player that passed the message, and the input keys that player pressed. - In the
handlePlayerInputfunction, we called thegetChildrenmethod of theplayersgroup to get an array of all of the game objects. We then loop through that array and check to see if that game object’splayerIdmatches the socket id of the player that passed the message. - If that
playerIdmatches, then we update that players data in ourplayersobject and store that players input. We are storing the player’s input that way we can use that data in ourupdatefunction.
Next, since we are storing the player’s input in a new property in the players object we will add default values to this object when we first create it. In the io.on('connection') callback function, add the following code to the players[socket.id] object:
input: {
  left: false,
  right: false,
  up: false
}
This object should look like this now:
// create a new player and add it to our players object
players[socket.id] = {
  rotation: 0,
  x: Math.floor(Math.random() * 700) + 50,
  y: Math.floor(Math.random() * 500) + 50,
  playerId: socket.id,
  team: (Math.floor(Math.random() * 2) == 0) ? 'red' : 'blue',
  input: {
    left: false,
    right: false,
    up: false
  }
};
With that done, we can now add the logic to the update function that will be responsible for moving each player’s game object.
Add the following code to the update function:
this.players.getChildren().forEach((player) => {
  const input = players[player.playerId].input;
  if (input.left) {
    player.setAngularVelocity(-300);
  } else if (input.right) {
    player.setAngularVelocity(300);
  } else {
    player.setAngularVelocity(0);
  }

  if (input.up) {
    this.physics.velocityFromRotation(player.rotation + 1.5, 200, player.body.acceleration);
  } else {
    player.setAcceleration(0);
  }

  players[player.playerId].x = player.x;
  players[player.playerId].y = player.y;
  players[player.playerId].rotation = player.rotation;
});
this.physics.world.wrap(this.players, 5);
io.emit('playerUpdates', players);
Let’s review the code we just added:
- First, we called the
getChildrenmethod of theplayersgroup to get an array of the player’s game objects and then we loop through this array using theforEachmethod. - In this loop, the first thing we do is create a new variable called
inputand we store the players’ input data there. We then check to see if theleft,right, orupkeys were pressed. - If the left or right key is pressed, then we update the player’s angular velocity by calling setAngularVelocity(). The angular velocity will allow the ship to rotate left and right.
- If neither the left or right keys are pressed, then we reset the angular velocity back to 0.
- If the up key is pressed, then we update the ship’s velocity, otherwise, we set it to 0.
- The last thing we do in the loop is we store the
x,y, androtationproperties of theplayergame object in ourplayersobject. We are storing these properties so that we can pass them back to the client side, and use that data to update player’s positions. - Then, we call
physics.world.wrap()and we pass it theplayersgroup and an offset of 5. This is used for when a player’s ship goes off the screen, it will force the player’s ship to appear on the other side of the screen. - Finally, we emit a
playerUpdatesmessage to all of out players and we pass ourplayersobject with this message.
Now that we have the code in place for handling player’s input on our server the last thing we need to do is update the client side to handle the new playerUpdates message. When the client side receives this message, we will use that data to update each players game object’s position and rotation.
To do this, open public/js/game.js and add the following code above the this.cursors = this.input.keyboard.createCursorKeys(); line in the create function:
this.socket.on('playerUpdates', function (players) {
  Object.keys(players).forEach(function (id) {
    self.players.getChildren().forEach(function (player) {
      if (players[id].playerId === player.playerId) {
        player.setRotation(players[id].rotation);
        player.setPosition(players[id].x, players[id].y);
      }
    });
  });
});
In the code above we did the following:
- First, we loop through the
playersobject that was passed with theplayerUpdatesmessage, and then we loop through all of the game objects in ourplayersgroup. - We then check to see if that
playergame objectsplayerIdmatches theplayerIdof theplayersobject. - If the
playerIdmatches, we then update that game object’s rotation and position by calling thesetRotationandsetPositionmethods.
If you save, restart your server, and refresh your game, you should now be able to move your ship around the screen.
Collecting stars
With our game now handling player’s input, we need to give the players a goal. For this tutorial, we are going to add a star collectible to the game for the players to collect, and when they do, their team will get ten points. To do this, we will need to create a few new game objects and a few new Socket.IO events. First, will focus on the star game object.
The asset for this collectible can be downloaded here. Place a copy of star_gold.png in both the public/assets and authoritative_server/assets folders.
Now, add the following code to the preload function in authoritative_server/js/game.js:
this.load.image('star', 'assets/star_gold.png');
Then, in the create function add the following code below:
this.scores = {
  blue: 0,
  red: 0
};

this.star = this.physics.add.image(randomPosition(700), randomPosition(500), 'star');
this.physics.add.collider(this.players);

this.physics.add.overlap(this.players, this.star, function (star, player) {
  if (players[player.playerId].team === 'red') {
    self.scores.red += 10;
  } else {
    self.scores.blue += 10;
  }
  self.star.setPosition(randomPosition(700), randomPosition(500));
  io.emit('updateScore', self.scores);
  io.emit('starLocation', { x: self.star.x, y: self.star.y });
});
In the code above we did the following:
- Loaded in our new
starimage in thepreloadfunction. - Created a new variable called
scoreswhich is an object we will use for storing the scores for both the red and blue teams. - Created a new game object for the
starcollectible, and we created a random position for thexandypositions by calling a new function calledrandomPosition. - Added a collider for our
playersPhaser group. When you pass a Phaser group to thephysics.add.collider()method, Phaser will automatically check for collisions between all of the child game objects. - Added an overlap between the
playersPhaser group and the star game object, and we provided a callback function to be called when one of the game object’s overlaps with another. When you pass a Phaser group and a single game object, Phaser will automatically check for collisions between all of the child game objects and the single game object. - In the callback function, we checked which
teamthe player game object belonged to and updated the score of that team. We then update the position of thestargame object by providing it a new random position. - Lastly, we emitted two new Socket.IO messages:
updateScoreandstarLocation. When we emit theupdateScoremessage, we also send thescoresvariable to the client side. When we emit thestarLocationmessage, we also send thexandyposition of thestargame object.
Next, in the io.on('connection') callback function add the following code below the socket.broadcast.emit('newPlayer', players[socket.id]); line:
// send the star object to the new player
socket.emit('starLocation', { x: self.star.x, y: self.star.y });
// send the current scores
socket.emit('updateScore', self.scores);
Finally, add the following code below the update function:
function randomPosition(max) {
  return Math.floor(Math.random() * max) + 50;
}
In the code above we:
- Send the location of the
stargame object and the current score to any new player that joins our game. - Added the
randomPositionfunction that was called in the code above.
With the code changes for the server in place, we will switch to the client side. The first thing we will do is load the star asset in the client side code. In public/js/game.js add the following line at the bottom of the preload function:
this.load.image('star', 'assets/star_gold.png');
Next, we will need a way of letting the players know what the current score is. We can do this by using Phaser’s text game objects. In the create function add the following code below the this.players = this.add.group(); line:
this.blueScoreText = this.add.text(16, 16, '', { fontSize: '32px', fill: '#0000FF' });
this.redScoreText = this.add.text(584, 16, '', { fontSize: '32px', fill: '#FF0000' });
In the code above, we created two new text game objects by calling this.add.text(). When we created these two objects, we passed the location of where the object would be placed, the default text of the object, and the font size and fill that would be used for the text object.
Finally, we just need to add the logic for the two new Socket.IO events we created. In the create function add the following code above the this.cursors = this.input.keyboard.createCursorKeys(); line:
this.socket.on('updateScore', function (scores) {
  self.blueScoreText.setText('Blue: ' + scores.blue);
  self.redScoreText.setText('Red: ' + scores.red);
});

this.socket.on('starLocation', function (starLocation) {
  if (!self.star) {
    self.star = self.add.image(starLocation.x, starLocation.y, 'star');
  } else {
    self.star.setPosition(starLocation.x, starLocation.y);
  }
});
Let’s review the code we just added:
- When the
updateScoreevent is received, we then update the text of the game objects by calling the setText() method, and we pass the team’s score to each object. - When the
starLocationevent is recieved, we first check to see if thestargame object doesn’t exist and if it doesn’t we create thestargame object at the location that was provided. If thestargame object does exist, then we just update it’s position by calling thesetPositionmethod.
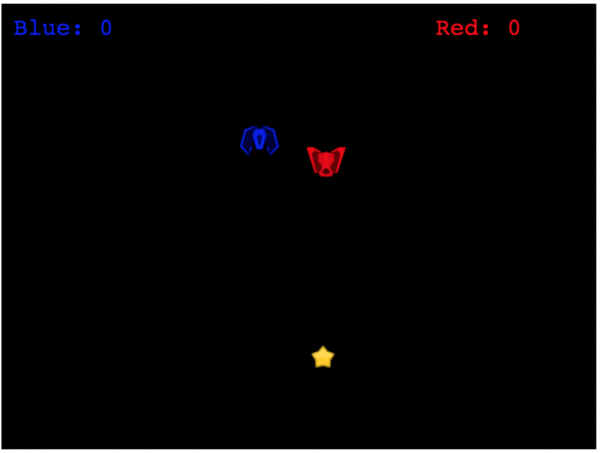
If you save your code changes, restart the server, and refresh your browser you should see the new star collectible and the team scores.
If you move your ship over the star collectible, you should see the star move to a new location and you should see the team score update. Also, if you open a new tab in your browser, you should be able to run your ship into the other player’s ship and see them collide.
Conclusion
With the star collectible added to the game, that brings this tutorial to a close. In summary, it showed you how to create a simple multiplayer game with an authoritative server in Phaser – mainly using Socket.IO and Node.js.
I hope you enjoyed all of these tutorials and found them helpful. If you have any questions, or suggestions on what we should cover next, please let us know in the comments below.
