In Part 4 of this tutorial series, we continued working on our Phaser leaderboard and we did the following:
- Updated our server to serve static files.
- Worked on the client side code by adding a login and signup page.
- Created a Phaser 3 leaderboard that displays the high scores from our database.
- Protected the game instance by adding middleware to that route on our server.
In Part 5 of this tutorial series, we will wrap up our tutorial by adding logic to our server that will allow a user to reset their password. For this logic, we will create a form that a user can fill out, and when they submit the form that form will send the user an email with a link to a password reset page. When the user clicks that link, it will include a special token that will allow them to reset their password.
If you didn’t complete Part 4 and would like to continue from here, you can find the code for it here.
You can download all of the files associated with the source code for Part 5 here.
Table of contents
Tutorial Requirements
For this tutorial, we will be using Nodemailer. Nodemailer is a Node.js module that makes it really easy to send emails. Nodemailer is easy to set up and offers many configuration options. For the purpose of this tutorial, we will be using a Gmail email account to send emails.
If you don’t have a Gmail account, you can create a free one here. You can still follow along with the tutorial if you prefer not to make an account, you would then just have to configure Nodemailer to use a different email service through additional research, as that is out of the scope of this tutorial.
Let’s get started!
Did you come across any errors in this tutorial? Please let us know by completing this form and we’ll look into it!

FINAL DAYS: Unlock coding courses in Unity, Godot, Unreal, Python and more.
Forgot Password Page
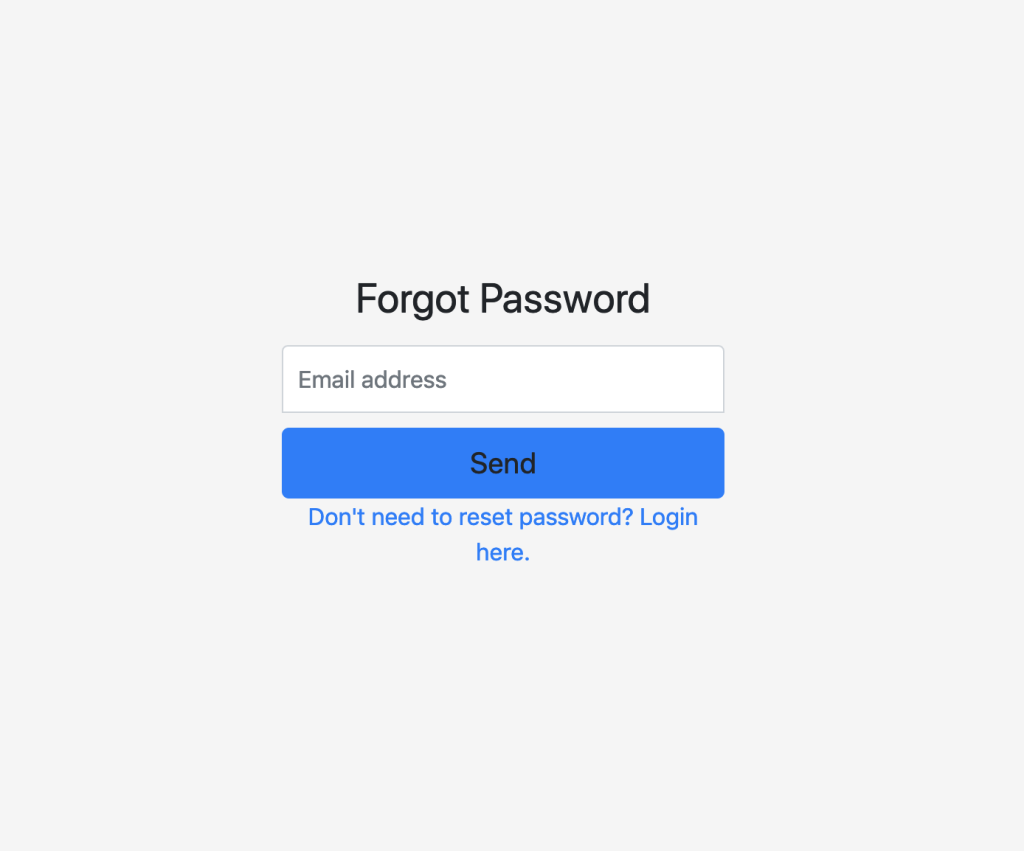
In order to allow users to reset their password, we will need to create 2 new HTML pages: one will be a form that will allow a user to request a link to reset their password, and the other will be a form that will allow the user to specify their password. We will first create the forgot password page. To do this, create a new file in the public folder called `forgot-password.html`, and in this file add the following code:
<!doctype html>
<html lang="en">

<head>
  <meta charset="utf-8">
  <meta name="viewport" content="width=device-width, initial-scale=1, shrink-to-fit=no">
  <title>Forgot Password Page</title>
  <link rel="stylesheet" href="https://stackpath.bootstrapcdn.com/bootstrap/4.3.1/css/bootstrap.min.css" integrity="sha384-ggOyR0iXCbMQv3Xipma34MD+dH/1fQ784/j6cY/iJTQUOhcWr7x9JvoRxT2MZw1T"
    crossorigin="anonymous">
  <link href="assets/css/main.css" rel="stylesheet">
  <script src="https://ajax.googleapis.com/ajax/libs/jquery/3.3.1/jquery.min.js"></script>
</head>

<body class="text-center">
  <form class="form-signin">
    <h1 class="h3 mb-3 font-weight-normal">Forgot Password</h1>
    <label for="email" class="sr-only">Email address</label>
    <input type="email" id="email" class="form-control" placeholder="Email address" required autofocus>
    <a class="btn btn-lg btn-primary btn-block" onClick="forgotPassword()">Send</a>
    <a href="/index.html">Don't need to reset password? Login here.</a>
  </form>
  <script>
    function forgotPassword() {
      var data = {
        email: document.forms[0].elements[0].value
      };
      $.ajax({
        type: 'POST',
        url: '/forgot-password',
        data,
        success: function (data) {
          window.alert(data.message);
          window.location.replace('/index.html');
        },
        error: function (xhr) {
          window.alert(JSON.stringify(xhr));
          window.location.replace('/forgot-password.html');
        }
      });
    }
  </script>
</body>

</html>
Let’s review the code we just added:
- We created a new HTML page using the same format that is used in the login and signup pages.
- We created a new form that takes the user’s email addresses, and when the user clicks the send button, it triggers a new
forgotPasswordfunction. - In the
forgotPasswordfunction, we take the value in the email field and send a POST request to the/forgot-passwordendpoint. - If the POST request is not successful, we alert the user of the error and refresh the page.
- If the POST request is successful, we alert the user and transfer them to the
index.htmlpage.
If you save your code changes and start your server, you will be able to view the new page here: http://localhost:3000/forgot-password.html
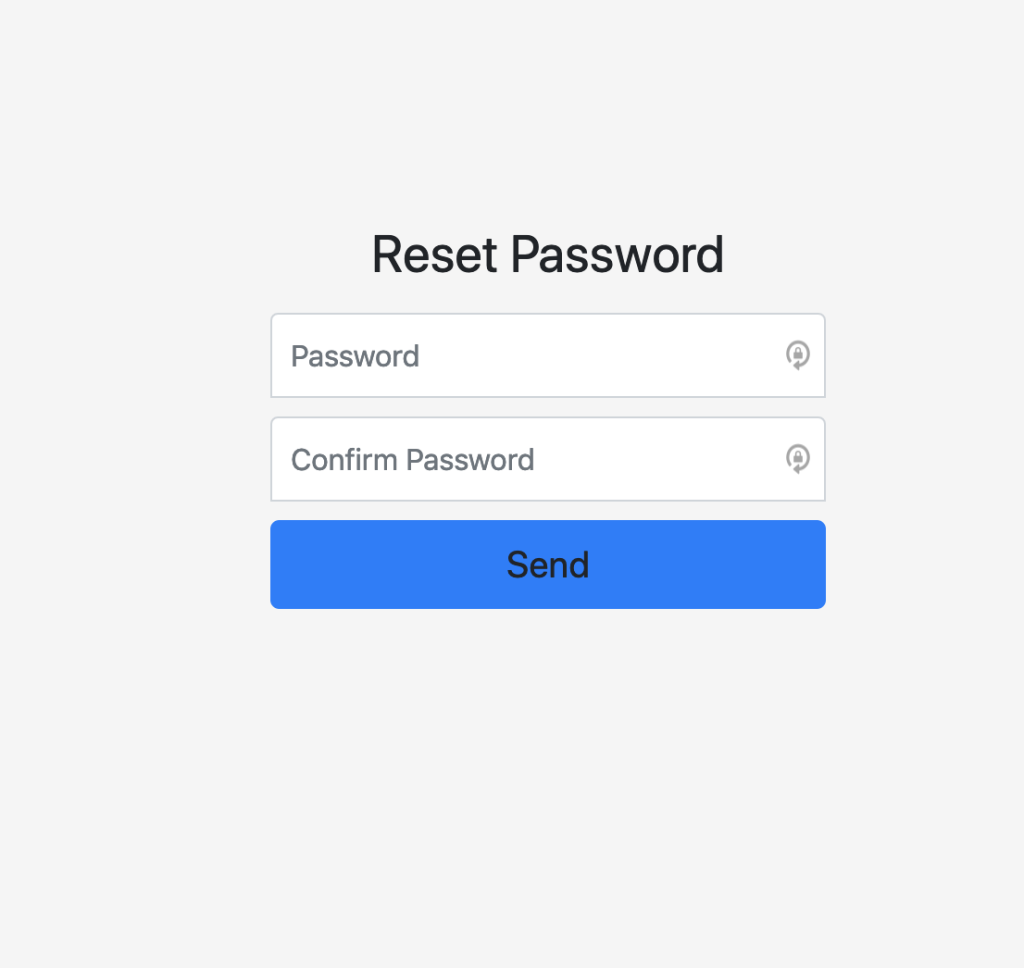
Reset Password Page
With the forgot password page in place, we will now create the reset password page. When we send the forgot password email, the link that is included in the email will include a token that we generate and save in our database. When the user clicks that link, that token will be added as a query string parameter when the user visits the reset password page. We will then use that token for verifying the user that is resetting their password.
To do this, create a new file in the public folder called reset-password.html, and in this file add the following code:
<!doctype html>
<html lang="en">

<head>
  <meta charset="utf-8">
  <meta name="viewport" content="width=device-width, initial-scale=1, shrink-to-fit=no">
  <title>Reset Password Page</title>
  <link rel="stylesheet" href="https://stackpath.bootstrapcdn.com/bootstrap/4.3.1/css/bootstrap.min.css" integrity="sha384-ggOyR0iXCbMQv3Xipma34MD+dH/1fQ784/j6cY/iJTQUOhcWr7x9JvoRxT2MZw1T"
    crossorigin="anonymous">
  <link href="assets/css/main.css" rel="stylesheet">
  <script src="https://ajax.googleapis.com/ajax/libs/jquery/3.3.1/jquery.min.js"></script>
</head>

<body class="text-center">
  <form class="form-signin">
    <h1 class="h3 mb-3 font-weight-normal">Reset Password</h1>
    <label for="password" class="sr-only">Password</label>
    <input type="password" id="password" class="form-control" placeholder="Password" required autofocus>
    <label for="verifiedPassword" class="sr-only">Confirm Password</label>
    <input type="password" id="verifiedPassword" class="form-control" placeholder="Confirm Password" required>
    <a class="btn btn-lg btn-primary btn-block" onClick="resetPassword()">Send</a>
  </form>
  <script>
    function resetPassword() {
      var token = document.location.href.split('token=')[1];
      var password = document.forms[0].elements[0].value;
      var verifiedPassword =  document.forms[0].elements[1].value;

      if (password !== verifiedPassword) {
        window.alert('passwords do not match');
      } else {
        var data = {
          password: password,
          verifiedPassword: verifiedPassword,
          token: token,
        };
        $.ajax({
          type: 'POST',
          url: '/reset-password',
          data,
          success: function (data) {
            window.alert(data.message);
            window.location.replace('/index.html');
          },
          error: function (xhr) {
            window.alert(JSON.stringify(xhr));
            window.location.replace('/reset-password.html');
          }
        });
      }
    }
  </script>
</body>

</html>
In the code above, we did the following:
- We created a new HTML page that has the same format as the forgot password page.
- We created a new form that has two fields, one for the user’s new password and one for the user to confirm their new password. When the user clicks the send button, it triggers a new function called
resetPassword. - In the
resetPasswordfunction, we pull thetokenvalue from the URL. We also pull the password and password confirmation fields from the form and double check that those two values are the same. If these values are not the same we send an alert to the user. - If the two password fields are the same, then we send a POST request to the
/reset-passwordendpoint. - If the POST request is not successful, then we alert the user about the error and then refresh the
reset-passwordpage. - If the POST request was successful, then we let the user know and redirect them to the
index.htmlpage.
If you save your code changes and navigate to http://localhost:3000/reset-password.html in your browser, you will be able to view the new reset password page.
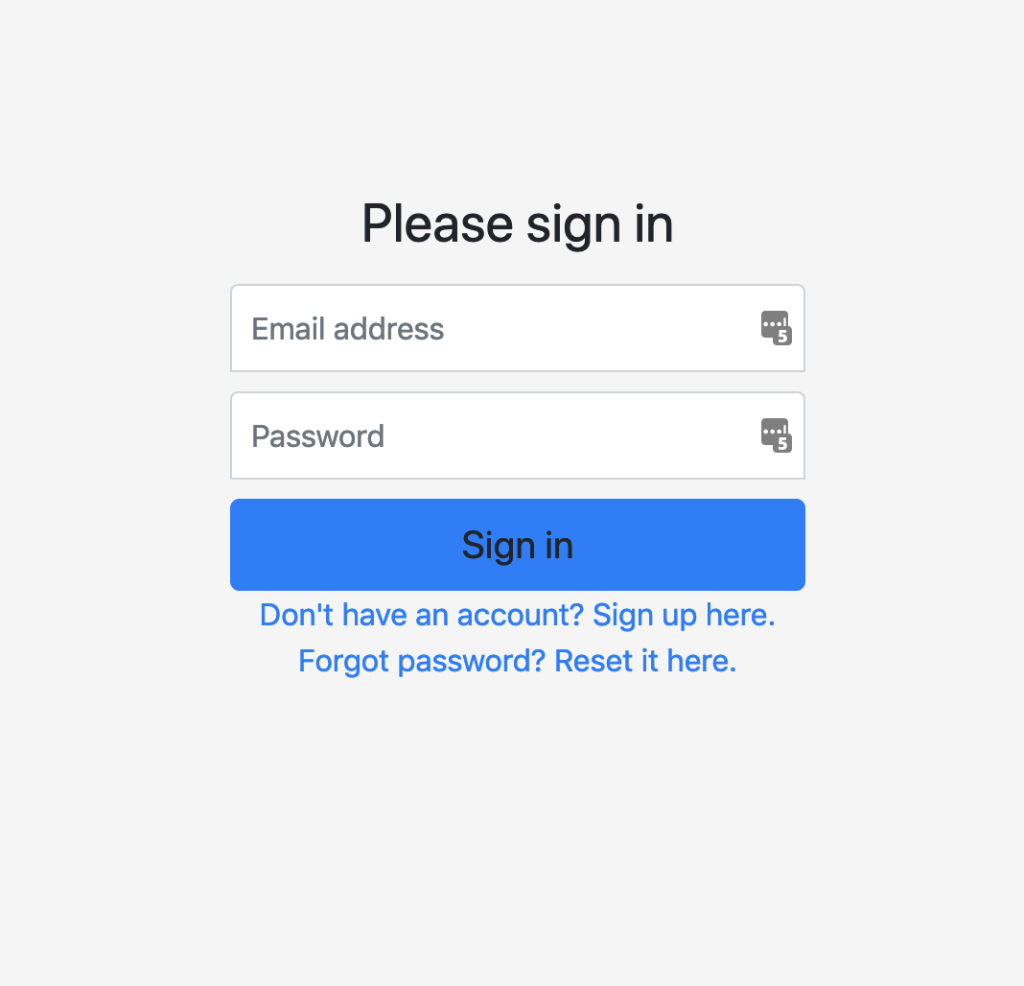
Updating the Login Page
With the reset password page completed, we need to make one more change to our client-side code before we begin on the server side code. In order to allow the user to reset their password, we need to provide them a way to get to the forgot password page. To do this, we will add a link on the login page.
Open public/index.html and add the following code right after the sign-up link, and before the closing form tag:
<a href="/forgot-password.html">Forgot password? Reset it here.</a>
If you save your code changes and visit the following URL in your browser: http://localhost:3000/index.html, you will be able to view the updated login page.
Adding the server logic
With the changes to our client-side code, we will start working on the server side code. As mentioned earlier, we will be using Nodemailer to send emails to the users that need to reset their passwords. We will also be using `nodemailer-express-handlebars` to create the HTML templates that will be sent to the users. Before we start adding any code, we will need to install the required modules.
To do this, run the following code in your terminal at the root of your project:
npm install nodemailer nodemailer-express-handlebars --save
Next, we will need to create the two routes we referenced in the client side code: /forgot-password and /reset-password. Instead of putting these routes in the routes/main.js file, we will create a new file to hold these routes since they will be used for sending emails. To do this, create a new file in the routes folder called password.js and add the following code to this file:
const express = require('express');
const hbs = require('nodemailer-express-handlebars');
const nodemailer = require('nodemailer');
const path = require('path');
const crypto = require('crypto');

const asyncMiddleware = require('../middleware/asyncMiddleware');
const UserModel = require('../models/userModel');

const email = process.env.EMAIL;
const pass = process.env.PASSWORD;

const smtpTransport = nodemailer.createTransport({
  service: process.env.EMAIL_PROVIDER,
  auth: {
    user: email,
    pass: pass
  }
});

const handlebarsOptions = {
  viewEngine: 'handlebars',
  viewPath: path.resolve('./templates/'),
  extName: '.html'
};

smtpTransport.use('compile', hbs(handlebarsOptions));

const router = express.Router();
Let’s review the code we just added:
- First, we imported
express,nodemailer-express-handlebars,nodemailer,path, andcrypto. We will be usingcryptofor creating the random token that will be used when a user resets their password. - We then imported
asyncMiddlewareandUserModel. - Next, we created a new SMTP transport object by calling the
createTransportmethod onnodemailer. ThecreateTransportmethod takes an options object as an argument, and in options object, we set the following fields:service– the email service provider we will be using. This will be set toGmailfor this tutorial.auth– an object that has the following fields:userandpass, which is set to the Gmail email address and the password for that account.
- Then, we created a new object called
handlebarsOptions, which will allownodemailerto use handlebar templates. For this object, we set the following fields:viewEngine– which templating engine we want to use.viewPath– the location of the templates we will be using.extName– the type of files that will be used for our templates.
- Next, we called the
usemethod on the SMTP transport object and told it to use handlebars when it is compiling our templates. - Lastly, we created a new express router.
Now, we need to add the logic for the two new routes to the password.js file. First, we will add the /forgot-password route. To do this, add the following code at the bottom of password.js:
router.post('/forgot-password', asyncMiddleware(async (req, res, next) => {
  const { email } = req.body;
  const user = await UserModel.findOne({ email });
  if (!user) {
    res.status(400).json({ 'message': 'invalid email' });
    return;
  }

  // create user token
  const buffer = crypto.randomBytes(20);
  const token = buffer.toString('hex');

  // update user reset password token and exp
  await UserModel.findByIdAndUpdate({ _id: user._id }, { resetToken: token, resetTokenExp: Date.now() + 600000 });

  // send user password reset email
  const data = {
    to: user.email,
    from: email,
    template: 'forgot-password',
    subject: '<a class="wpil_keyword_link" href="https://gamedevacademy.org/what-is-phaser/" target="_blank" rel="noopener" title="Phaser" data-wpil-keyword-link="linked">Phaser</a> Leaderboard Password Reset,
    context: {
      url: `http://localhost:${process.env.PORT || 3000}/reset-password.html?token=${token}`,
      name: user.name
    }
  };
  await smtpTransport.sendMail(data);

  res.status(200).json({ message: 'An email has been sent to your email. Password reset link is only valid for 10 minutes.' });
}));
In the code above, we did the following:
- We created a new POST route called
/forgot-password, and wrapped this function in theasyncMiddlewaremiddleware. - Inside the function that is called when this route is visited, we pulled the
emailfield from the request body and then used thefindOnemethod on theUserModelto search our database for a user that has the same email address. - If a user is not found, then we return a 400 response. If a user is found in the database, then we use
crypto.randomBytesto create a new token. We then use thefindByIdUpdatemethod to update the user document that was found by updating theresetTokenandresetTokenExpfields (these fields have not been created yet). We set theresetTokenfield to the token that we created and set theresetTokenExpfield to be set to a timestamp that is 10 minutes from now. - After the user document is updated, we then send out a password reset email by calling the
sendMailmethod on the SMTP transport object. This method takes an options object that has the following fields:to– the user’s email addressfrom– our Gmail email addresstemplate– the name of the template we are going to sendsubject– the subject of the emailcontext– an object of values that we will use to populate values in the email template
- Finally, we return a 200 response with a message that will be displayed to the user.
Next, we will add the logic for the /reset-password route. To do this, add the following code at the bottom of password.js:
router.post('/reset-password', asyncMiddleware(async (req, res, next) => {
  const user = await UserModel.findOne({ resetToken: req.body.token, resetTokenExp: { $gt: Date.now() } });
  if (!user) {
    res.status(400).json({ 'message': 'invalid token' });
    return;
  }

  // ensure provided password matches verified password
  if (req.body.password !== req.body.verifiedPassword) {
    res.status(400).json({ 'message': 'passwords do not match' });
    return;
  }

  // update user model
  user.password = req.body.password;
  user.resetToken = undefined;
  user.resetTokenExp = undefined;
  await user.save();

  // send user password update email
  const data = {
    to: user.email,
    from: email,
    template: 'reset-password',
    subject: 'Phaser Leaderboard Password Reset Confirmation',
    context: {
      name: user.name
    }
  };
  await smtpTransport.sendMail(data);

  res.status(200).json({ message: 'password updated' });
}));

module.exports = router;
In the code above, we did the following:
- We created a new POST route called
/reset-password, and wrapped this function in theasyncMiddlewaremiddleware. - Inside the function that is called when this route is visited, we look for a user in the database that has the
tokenthat is passed in the request body and has aresetTokenExpvalue that is greater than the current time. - If a user is not found in the database, or if the
passwordandverifiedPasswordfields that are passed in the request body do not match, then we return a 400 response. - Next, we set that user’s password to the provided
passwordand we set theresetTokenandresetTokenExpfields toundefined. - Finally, we send out an email using the
reset-passwordtemplate and return a 200 response.
With the logic for the routes in place, we need to update the User Model and update our server to use these new routes. For the User Model, we just need to add the two new fields we referenced in the code above: resetToken and resetTokenExp. In models/userModel.js, add the following code to the UserSchema:
resetToken: {
  type: String
},
resetTokenExp: {
  type: Date
}
Next, in app.js add the following code at the top of the file with the other require statements:
const passwordRoutes = require('./routes/password');Then, add the following code below the following line in app.js: `app.use(‘/’, routes);`:
app.use('/', passwordRoutes);Email Templates
Now that the express server has been updated to use the new routes, we need to create the email templates that will be sent to the users. In the root of the project, create a new folder called templates. In the templates folder, create two new files: forgot-password.html and reset-password.html. Then, in forgot-password.html add the following code:
<!DOCTYPE html>
<html>

<head>
  <title>Forget Password Email</title>
</head>

<body>
  <div>
    <h3>Dear {{name}},</h3>
    <p>You have requested to reset your password. Please use this <a href="{{url}}">link</a> to reset your password.</p>
  </div>

</body>

</html>
Next, in reset-password.html add the following code:
<!DOCTYPE html>
<html>

<head>
  <title>Password Reset</title>
</head>

<body>
  <div>
    <h3>Dear {{name}},</h3>
    <p>Your password has been successful reset, you can now login with your new password.</p>
  </div>
</body>

</html>
In the code above, the code that is inside the {{}} will be populated with the values that are passed in the context object we created in the routes file.
Finally, the last thing we need to do is update the .env file with the new environment variables we referenced in our code. In the .env file, add the following code at the bottom of the file:
EMAIL=PLACEHOLDER
PASSWORD=PLACEHOLDER
EMAIL_PROVIDER=Gmail
Note: you will need to update the PLACEHOLDER values with your Gmail email address and your Gmail password. If you choose to use a different email provider, you will need to update the EMAIL_PROVIDER value.
Now, if you save your code changes and restart your server, you will be able to test your new changes.
If you create a user with a valid email address, and then visit http://localhost:3000/forgot-password.html and enter that email address, you should get a message about the email being sent successfully.
Then, if you check your email you should receive an email with a link to reset your password.
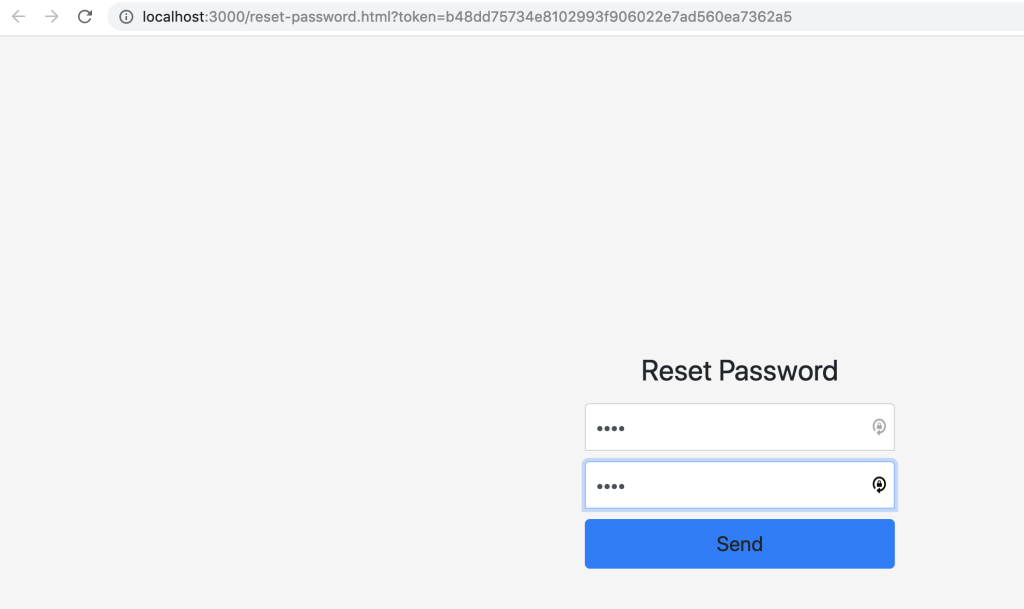
If you click the link, you should be taken to the password reset page, and you should see a unique token in the URL.
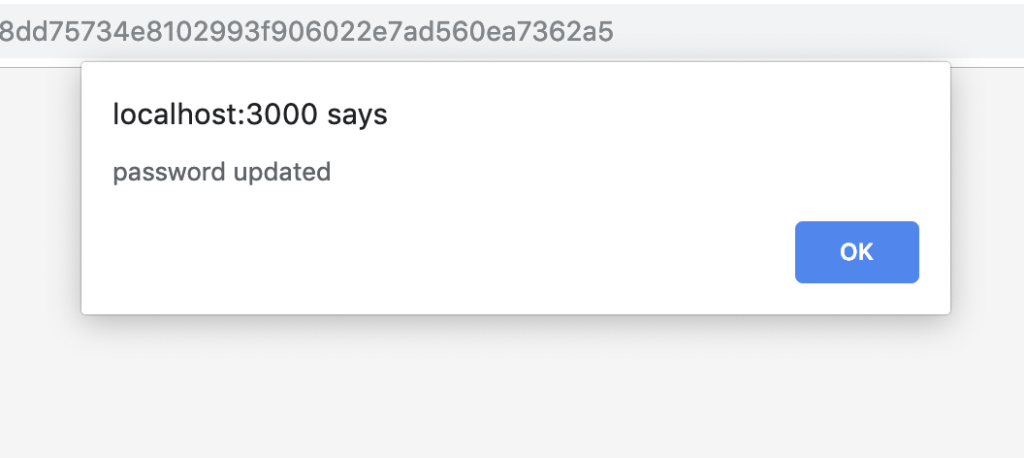
If you fill out the reset password form and submit the form, you should get a message about your password being reset successfully.
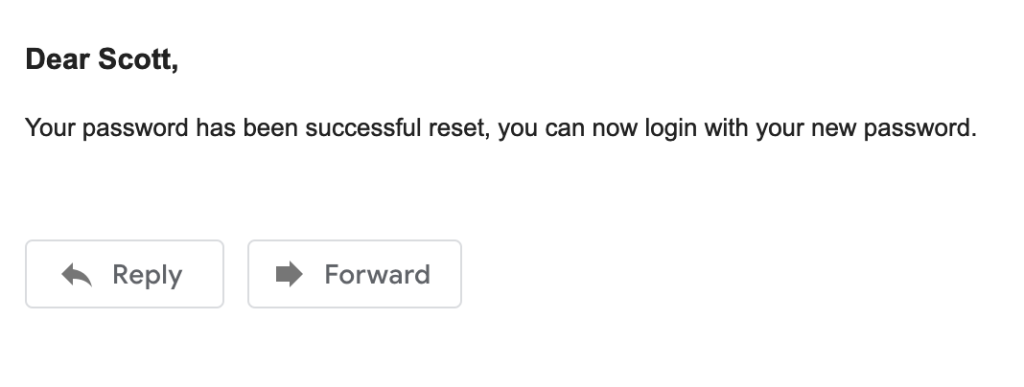
Lastly, if you check your email you should have received an email letting you know that your password was updated.
Conclusion
With the password reset flow now working, that brings this tutorial series to an end.
I hope you enjoyed this tutorial and found it helpful. If you have any questions, or suggestions on what we should cover next, please let us know in the comments below.

